

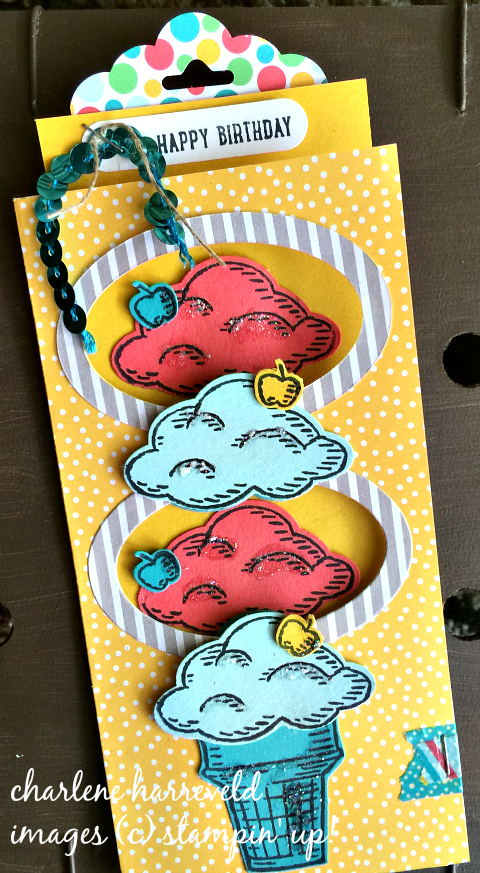
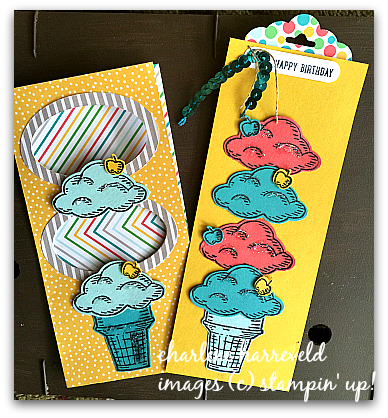
I created a slider bookmark card to showcase this year’s Stampin’ Up! stamp set to benefit Ronald McDonald House Charities. Below is a picture tutorial of the measurements. (You can see the original post HERE.)
Step One / The Outside Pocket:
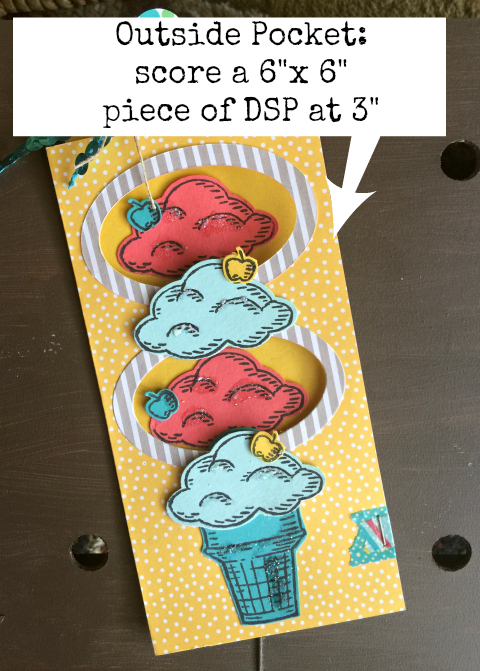
1) Score a piece of 6″ x 6″ Designer Series Paper at 3″
2) To make the ovals’ frames, die cut the Designer Series Paper using the smallest oval and second smallest oval like shown in the photo below. Cut two and set aside for later.

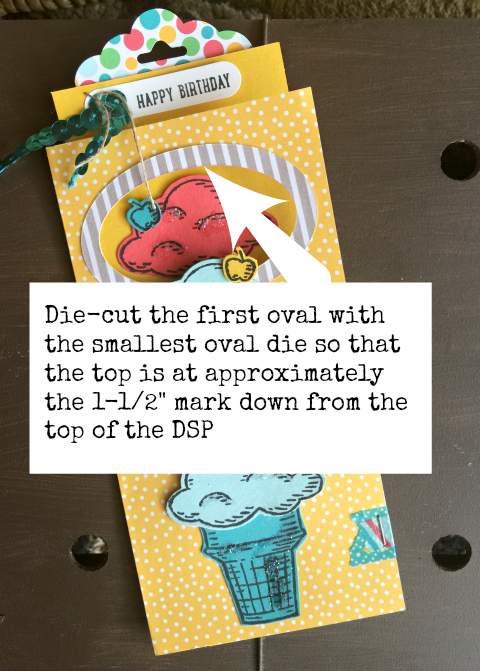
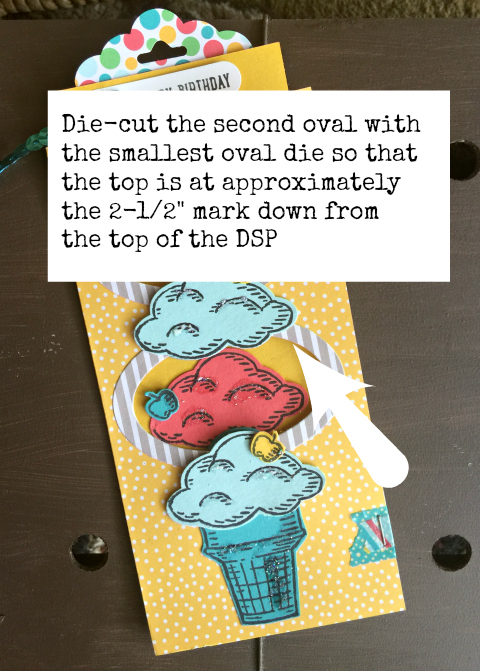
3) To make the oval cuts in the outside pocket, die-cut the first oval with the smallest oval die so that the top of the oval is at approximately 1-1/2″ down from the top of the DSP
4) To make the second oval, use the smallest oval die so that the top of the oval is at approximately the 2-1/2″ mark down from the top of the DSP
Step Two / The Inside Piece:
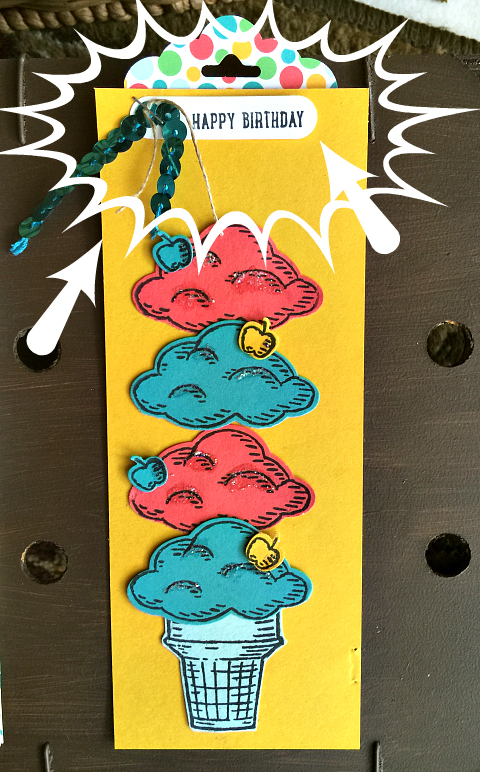
1) Cut the inside bookmark piece 2-1/2″ x 6-1/2″

2) Decorate the very top of the bookmark however you would like!
Step Three / The Ice Cream and Cone:
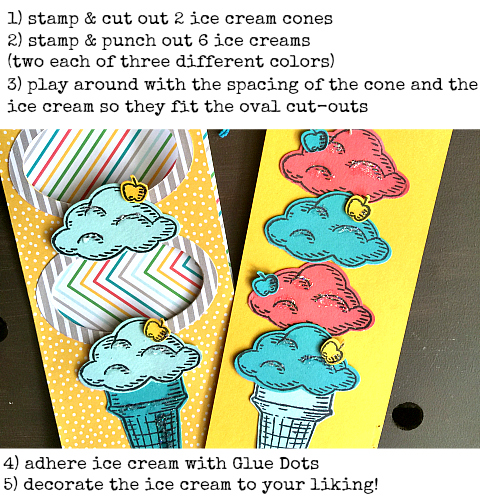
1) Stamp and cut out two ice cream cones
2) Stamp and punch six ice creams (two each of three different colors)
3) Adhere the oval frames that you die-cut in step one to the ovals on the outside pocket
4) Play around with the spacing of the cones and the ice creams so they fit the oval cut-puts
5) Adhere pieces with Glue Dots
6) Decorate ice cream to your liking!
That’s all! You did it! Leave a comment with a link to your version of the slider bookmark card in the comments section so we can all see!